Photoshop: How to make an aged photo
Here’s the photoshop tutorial on how to take any new photo and make it “any old photo.” Actually … it’s a fairly simple process (if you know your photoshop basics) to place anything onto a textured background. It’s probably not earth shattering, but I haven’t come across it in my 18 years of image editing, so maybe it can be helpful for you as well.
(My photoshop lessons aren’t written for beginners — althought one could figure it out — so I’ll go at a pretty rapid pace on the assumption that you know the basics pretty well.)
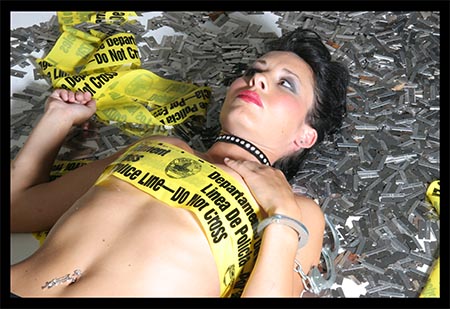
I assume you have a starting image that you’d like to put onto a photoshop background. Here’s mine, in all it’s raw, overexposed glory. I call it “Amanda on Razors” because, well, it is:
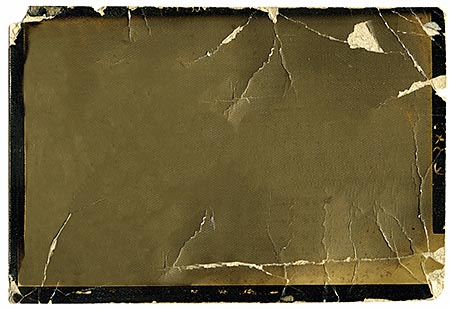
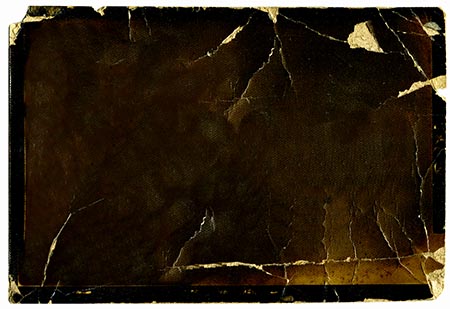
Then, go find a good background to put it on. Ideally you want something with good contrast, that will provide a good bacgkround. This one — from www.istockphoto.com — was perfect. (But please don’t use this low-res version … go buy your own copy.):
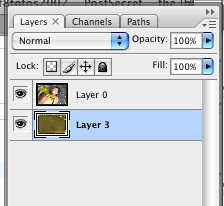
(1) Now we get to the photoshop part … take your original image (Amanda), paste in the picture image, and resize the picture to the the proper size. Then move it to the back. Your layers palette should look like this, basically:
(2) Do all the things you want to do to the main photo (Amanda). In this case, the only thing I did is convert her to black & white.
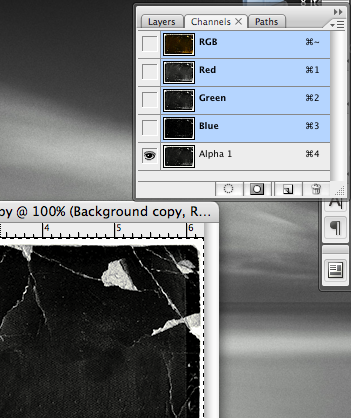
(3) Now, here’s the trick. We’re going to create our Alpha Channel. Make a duplicate of the background image channel … and then use levels to make the outside edges 100% white (or 0% black, depending if you’re an optimist or not). Most of the rest of the image should be 100% black, and the cracks and “see through” items should be as close to white as possible. (This should all be pretty easy with levels … a 2 minute or less task.) My alpha-channel-to-be layer looked like this:
(4) Select all and Copy this layer. Then go to your Channels pallette, and paste it into a new Alpha Channel. Here’s what you should see:
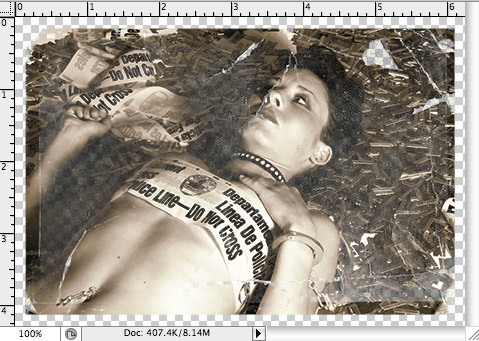
(5) Okay! We’re almost done. Load selection … and load your Alpha Channel that you just made. Then, use Layer –> Hide Selection while you have your main (Amanda) image selected. She’ll disappear appropriately:
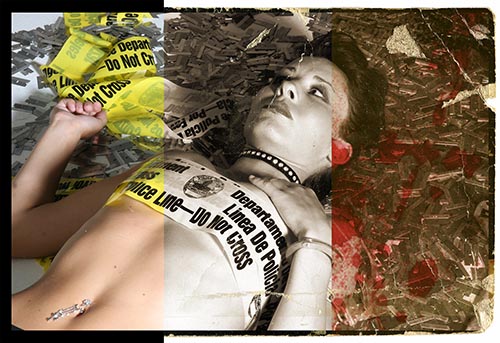
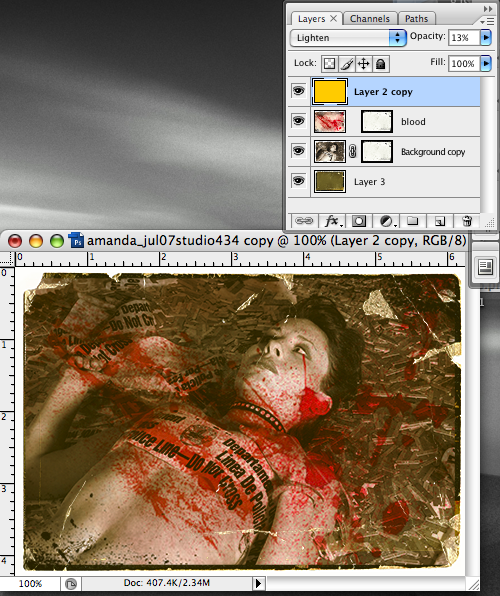
(6) Now just clean it up! Turn on the background layer to “fill the holes” that are left in the image there (and it will add some texture back in the partially “see through” areas). Find some blood splatters and put them on top on Multiply mode. (By the way, use the same Alpha layer mask over and over again on any add-on layers.) And — in this case — add some toning by putting a Lighten layer on top with some opacity. I also threw away my layer for the Alpha Channel, as it is saved as an Alpha Channel already. Here’s the final look of the layers, and the final image:
So … maybe that was long, too advanced, not advanced enough … you’ll have to let me know what worked (and didn’t) for you. But I know that I would love to see more “how to’s” from my favorite photographers, and not things that are overly simplified. I’ve added a new category, by the way, of Photoshop How To’s … if you’re looking for more, just click on that. (As of this writing there are only two.)
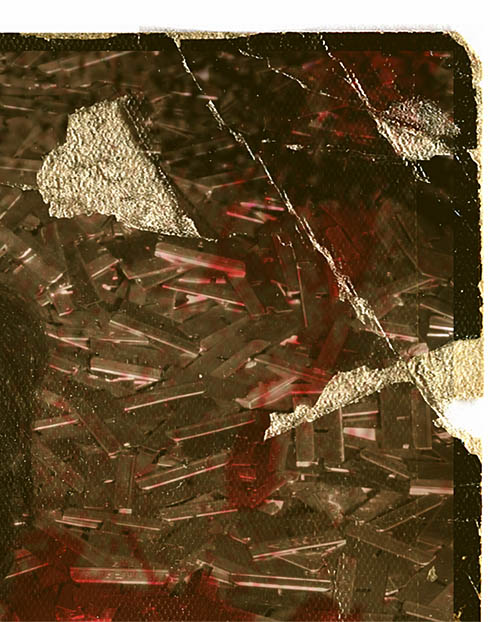
Here’s a little detail, so you can see how cool this comes out in high-res:
I think on my final-final image I added a slight drop shadow to make the picture stand a tiny bit off of the background. Send me links to your pix!
…. one more thing, do you teach a Photoshop course ?
Stefan
Thanks, Stefan, for the kind words … but I do not teach any Photoshop courses currently …
But maybe I should do more “How To’s” on the blog?